Last year Dagfinn Parnas wrote an article about combining SAPUI5 and PhoneGap:
Building awesome mobile apps with SAPUI5 and PhoneGap
Dagfinn Parnas didn't use the SAPUI5 mobile library so the full power of combining SAPUI5 and PhoneGap wasn't achieved. I haven't found anyone else on the internet make this possible either. With this blog post I will demonstrate how you can combine SAPUI5 mobile library with PhoneGap. This will make it possible for you to build native apps for all mobile platforms. You can use eclipse if you want but I will demonstrate the process without it for you, so that you will understand it deeper.
All the below files are available at my GitHub:
https://github.com/morganap/SAPUI5andPhonegap
Step 1:
Download SAPUI5: http://scn.sap.com/community/developer-center/front-end
Unzip the downloaded file.
Step 2:
In the SAPUI5 folder delete the following to reduce its size:
From sapui5-static.zip, delete:
/test-resources/*
/discovery/*
/resources/sap-ui5-dbg.js
/resources/sap-ui-core-all-dbg.js
/resources/sap/uiext/*
/resources/sap/service/*
/resources/sap/makit
/resources/sap/viz chart libraries
and in /resources/sap/ui/ the following library folders
commons
qunit
richtexteditor
table
test
ux3
The instruction above is from Andreas Kunz: http://scn.sap.com/thread/3287821
Step 3:
In the SAPUI5 folder you copy the resources folder to a place where you want to develop the web app.
(If you already have SAPUI5 version 1.10.4 and want to retrieve the resource folder check my other article
"SAP and mobile powers combined through SAPUI5 and Phonegap - make it work with new SAPUI5 version")
And then create an index.html file and a config.xml file like the picture below:

In the index.html file insert the code bellow:
| Filename: index.html |
|---|
<!DOCTYPE HTML> <html> <head> <meta http-equiv="X-UA-Compatible" content="IE=edge">
<script src="phonegap.js"></script> <script type="text/javascript" charset="utf-8">
var pictureSource; // picture source var destinationType; // sets the format of returned value
// Wait for Cordova to connect with the device // document.addEventListener("deviceready",onDeviceReady,false);
// Cordova is ready to be used! // function onDeviceReady() { pictureSource=navigator.camera.PictureSourceType; destinationType=navigator.camera.DestinationType; navigator.geolocation.getCurrentPosition(onSuccess, onError, {enableHighAccuracy:true}); }
// Called when a photo is successfully retrieved // function onPhotoDataSuccess(imageData) { // Uncomment to view the base64 encoded image data // console.log(imageData);
// Get image handle // var smallImage = document.getElementById('smallImage');
// Unhide image elements // smallImage.style.display = 'block';
// Show the captured photo // The inline CSS rules are used to resize the image // smallImage.src = "data:image/jpeg;base64," + imageData; }
// Called when a photo is successfully retrieved // function onPhotoURISuccess(imageURI) { // Uncomment to view the image file URI // console.log(imageURI);
// Get image handle // var largeImage = document.getElementById('largeImage');
// Unhide image elements // largeImage.style.display = 'block';
// Show the captured photo // The inline CSS rules are used to resize the image // largeImage.src = imageURI; }
// A button will call this function // function capturePhoto() { // Take picture using device camera and retrieve image as base64-encoded string navigator.camera.getPicture(onPhotoDataSuccess, onFail, { quality: 50, destinationType: destinationType.DATA_URL }); }
// A button will call this function // function capturePhotoEdit() { // Take picture using device camera, allow edit, and retrieve image as base64-encoded string navigator.camera.getPicture(onPhotoDataSuccess, onFail, { quality: 20, allowEdit: true, destinationType: destinationType.DATA_URL }); }
// A button will call this function // function getPhoto(source) { // Retrieve image file location from specified source navigator.camera.getPicture(onPhotoURISuccess, onFail, { quality: 50, destinationType: destinationType.FILE_URI, sourceType: source }); }
// Called if something bad happens. // function onFail(message) { alert('Failed because: ' + message); }
// onSuccess Geolocation // function onSuccess(position) { var element = document.getElementById('geolocation'); element.innerHTML = 'Latitude: ' + position.coords.latitude + '<br />' + 'Longitude: ' + position.coords.longitude + '<br />' + 'Altitude: ' + position.coords.altitude + '<br />' + 'Accuracy: ' + position.coords.accuracy + '<br />' + 'Altitude Accuracy: ' + position.coords.altitudeAccuracy + '<br />' + 'Heading: ' + position.coords.heading + '<br />' + 'Speed: ' + position.coords.speed + '<br />' + 'Timestamp: ' + position.timestamp + '<br />'; }
// onError Callback receives a PositionError object // function onError(error) { alert('code: ' + error.code + '\n' + 'message: ' + error.message + '\n'); } </script> <script src="resources/sap-ui-core.js" id="sap-ui-bootstrap" data-sap-ui-libs="sap.m" data-sap-ui-theme="sap_mvi" > </script> <script> // create a mobile App // it initializes the HTML page for mobile use and provides animated page handling var app = new sap.m.App("myApp", {initialPage:"page1"}); // page1 should be displayed first
// create the first page of your application var page1 = new sap.m.Page("page1", { title: "SAPUI5 and Phonegap", content : [new sap.m.Text({text:"Hello Mobile World!"}), new sap.m.Button({ // content is just one Button text : "Go to next page", tap : function() { app.to("page2", "fade"); // when tapped, it triggers drilldown to page 2 } }), new sap.m.Button("open_camera_button", { text : "Open camera", tap : function () { capturePhoto(); } }), new sap.ui.core.HTML({content:'<p id="geolocation">Finding geolocation...</p> <img style="display:none;width:60px;height:60px;" id="smallImage" src="" /><img style="display:none;" id="largeImage" src="" />'}) ]} );
page1.setBackgroundDesign("List");
// create the second page of your application var page2 = new sap.m.Page("page2", { title: "Page 2", showNavButton: true, // page 2 should display a back button navButtonTap: function(){ app.back(); // when tapped, the back button should navigate back up to page 1 }, content : new sap.m.Text({text:"Hello Mobile World!"}) });
app.addPage(page1).addPage(page2); // add both pages to the App
app.placeAt("content"); // place the App into the HTML document </script> </head> <body class="sapUiBody" role="application"> <div id="content"></div> </body> </html> |
Step 4
Insert the following code in the config.xml file:
| Filename: config.xml |
|---|
<?xml version ="1.0" encoding="UTF-8" ?> <widget xmlns = "http://www.w3.org/ns/widgets" xmlns:gap = "http://phonegap.com/ns/1.0" id = "com.intel.sample" versioncode = "1" version = "1.0.0">
<name>SAPUI5 and Phonegap</name>
<content src="index.html"/>
<description> Test application with SAPUI5 and Phonegap </description>
<preference name="phonegap-version" value="2.0.0" /> <feature name="http://api.phonegap.com/1.0/camera"/> <feature name="http://api.phonegap.com/1.0/file"/> <feature name="http://api.phonegap.com/1.0/geolocation"/>
<!-- for iPhone --> <plugin name="Camera" value="CDVCamera" /> <plugin name="Geolocation" value="CDVLocation" />
<!-- for Android --> <plugin name="Camera" value="org.apache.cordova.CameraLauncher"/> <plugin name="Geolocation" value="org.apache.cordova.GeoBroker" /> <preference name="orientation" value="portrait" /> <preference name="android-minSdkVersion" value="9" /> </widget> |
Step 5
Make your files to a zip file:

------------------------------------------------------------------------------------------------------------------------------------

------------------------------------------------------------------------------------------------------------------------------------

Step 6
Create a free account at:
This web service makes it possible to build native apps to all different mobile platforms without needing to setup different native SDK environment for every mobile platform.
Step 7
Log in with your new account:
Create a new app by pressing the new app button. Then choose private, like the below picture.

Upload your index.zip file that you created in step 5.
Step 8
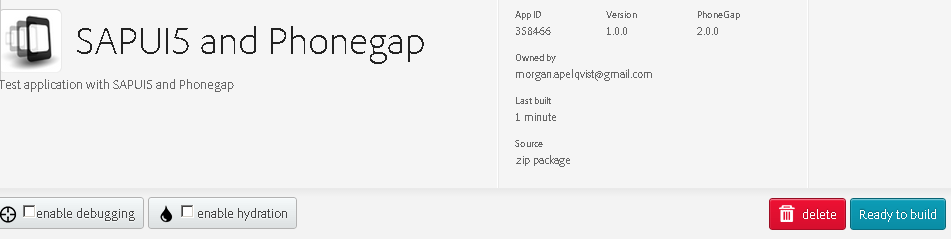
When the upload is complete this app will appear. Press the "Ready to build" button.
Now wait for the build to complete for all the different mobile platforms.
Step 9
The build will succeed for every platform except iOS and blackberry. If you want to create iOS apps you will need to enter a developer code. It will require you to have an apple computer, iPhone and an apple developer account. Blackberry complains because it thinks there are too many files uploaded. This can sure be fixed and if anyone will give it a try I appreciate it.

Press the android figure above and a download of the apk file for that platform will begin. You can download the platform you want but I will describe below for the android platform. Send the downloaded file to your android phone. You can for example email it. Before opening the file you need to allow unknown sources in your phone:
For android 4 devices and up:
- Tap Menu.
- Tap Security.
- Check the box labeled Unknown Sources.
For older android devices:
- Tap Menu.
- Tap Settings.
- Tap Applications.
- Check the box labeled Unknown Sources.
Step 10
Now open your apk file in your android mobile device. This will give you an option to install it. Choose to install.
Step 11
Open your newly created application. Play around with the app! You can test to press the camera button.

The camera opens and you take a picture. Then the picture is placed under the Timestamp text:

Step 12
The above steps show how easy it is to develop apps for all mobile platforms using SAPUI5 and PhoneGap. So what are you waiting for! Give it a try!
Unleash the power of SAP and mobiles combined!


 . Then things got busy, and I only came back to this example a few days ago when I wanted to get the same example working from a "real" SAP system where we recently installed the SAP UI Add-On 1.0 and Gateway.

 . Now reading release notes isn't that much fun, but I started with version 1.4.3 and worked up to see if anything might mention a change that was causing the problem... and there it was...


