What is the Search for Atlantis
A while ago, a few of us came together to "search for Atlantis". If you want to know more about this now dormant initiative, check out the article in the SAP Mentors Quarterly - Q1 2011 but in a nutshell, it's trying to get conversations happening within the SAP ecosystem about both SAP and non-SAP topics that are undergoing a lot of change that people should be aware about. Plus, where possible providing some guidance since we all love hearing "It Depends" from our SAP consultants. Anyway, I've revived the name for a blog about UI but I'm happy for others to "search for Atlantis" with us and write their own blog posts under this banner (or not).
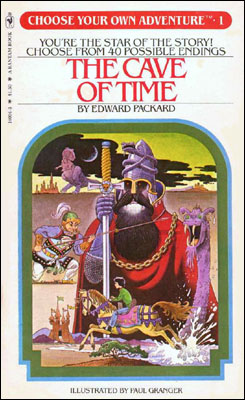
Choose your own UI Adventure
![]()
Some of the older or nostalgic people out there may remember the fad that was choose your own adventures back in the 80’s and this blog is dedicated to that medium to help explain the adventure that is User Interface development in SAP.
As with all content on SCN, be aware that this is very rough advice based on my experience/exposure and while I hate “it depends” answers, there’s definitely devil in the detail around defining strategies and most of below is only a fraction of the questions that really should be asked. e.g. I’m brushing over things like Portal, Mobility, non-ABAP back-ends, latency issues, etc.
Anyway let’s begin (hopefully I didn't miss an ending as these are tough to write!?!):
- Page 1 -
The date is the 15th of April, 2014 and it’s your first day at “We Do Stuff Good” INC/Pty Ltd and you’re brought into the board room and the CEO has asked you to define a UI technology strategy for development of a large new solution within an existing Portal they are urgently needing to build.
If you say, “Okay, I’m done. Thanks but no thanks!” turn to Page 2.
If you say, “I’ll get right on it” turn to Page 3.
- Page 2 -
You live happily ever after.
- Page 3 -
You go back down the elevator from floor 50 down to the basement where your team is and start asking questions.
If you discover that you don’t have SAP and never will have for this project, ironically turn to Page 2.
If you have SAP turn to Page 4.
- Page 4 -
You find out the solution is interfacing directly with your SAP ERP 6.0x (ABAP) application data and there is no commercially available solution from anyone available in the next 12-24 months so buying is not an option, so you then ask whether the solution is for external users or for internal users.
If it is for external users, turn to Page 5.
If it is for internal users, turn to Page 6.
- Page 5 -
Because these new external users are not licensed under any existing product and there is no off the shelf online solution available, you say “okay, I’ll need to use NetWeaver Gateway if only to give us an easy way to expose the SAP side to these users”. The others sigh and agree.
If the external users are trusted users that you can dictate client requirements to and there's no company push to get SAPUI5/Gateway in place, and people upskilled ASAP, then turn to Page 19.
If the external users are not a easily controlled set of users, turn to Page 6.
- Page 6 -
You ask to see the web development team to get more information about their existing tools, processes, etc.
If they say, “Good idea, anything externally facing is developed by this team”, go to page 7.
If they say, “There is no web development team, just us”, or “that team is only used for the marketing website and don’t touch application development” go to page 8.
- Page 7 -
You meet up with the lead from the web development team and you ask about the team’s background and how they currently development solutions.
If the lead says, “We’re mainly a Microsoft shop and use Visual Studio and Team Foundation Server tools though leverage Open Source where appropriate”, turn to Page 9.
If the lead says, “We’re mainly an Open Source shop and each developer has their own favourite editor, but we've standardised on our frameworks and deployment/test automation”, turn to Page 10.
- Page 8 -
So you’re pretty sure you know what to do, but one question remains; is this an application that needs to be lightning fast around the globe, not be bandwidth hungry at all or need to support...wait for it...IE8 or less ![]() .
.
If yes, turn to Page 11.
If no, turn to Page 25.
- Page 9 -
If the lead also stated, “we are using Odata already and also leveraging one of the JavaScript framework libraries included in Visual Studio", turn to Page 12.
If the lead alternatively says, “we aren’t doing anything with Odata yet and are not fixed on one set of web frameworks”, turn to Page 13.
- Page 10 -
Introduce SAPUI5 (or openui5 more importantly), and discuss whether it could be the framework for SAP development since it provides better capabilities with leveraging odata
Turn to Page 2.
- Page 11 -
Engage your Web specialists to ensure they build a supportable framework and appropriate Content Delivery Network topology to build your solution in, leveraging Gateway for service calls. Make sure that the team is still aware of the capabilities of SAPUI5 just in case.
Turn to Page 2.
- Page 12 -
Introduce SAPUI5 (or openui5 more importantly), and discuss how it could be of use, and stick to the existing frameworks if appropriate and current.
Turn to Page 2.
- Page 13 -
Introduce SAPUI5 (or openui5 more importantly), and discuss whether it could be the framework for SAP development since it provides better capabilities with leveraging odata.
Turn to Page 2.
- Page 14 -
This page intentionally left blank
- Page 15 -
You realise that without knowing more about the solution’s requirements, you will be generalising way too much with technology decisions, so you ask about the personas and the scenarios being supported.
If you find out it is more a tool of the trade where people will be solely using this day in/day out to do their job including outside the office, sometimes without network access, turn to Page 16.
If you find out it’s more an online scenario combined with many other online scenarios, turn to page 24.
- Page 16 -
You realise you are heading down the path of an offline SAP Mobile Platform based solution such as Agentry, or possibly a Kapsel wrapped UI5 application with offline storage. You set the strategy, but say we’ll need to get to the bottom of the solution before going much further down a specific path.
Turn to Page 2.
- Page 17 -
You are starting to see a real opportunity here so you ask whether they have Fiori elements like Gateway in place already or desire to do so; and whether they are interested in the development team learning HTML, CSS and JavaScript.
If they disappointingly say they don’t have anyone who wants to learn that stuff, and like staying in the ABAP world, turn to page 19.
If they are all for the (current) future of UI development in SAP, then thankfully turn to page 18.
- Page 18 -
You settle on SAPUI5 for your UI technology strategy (amongst many other things), and start thinking about the security requirements, and mobility aspects required for the solution also. Also, you get support from the CIO to hire a UX specialist/UI Designer who is also very comfortable with HTML/CSS to ensure solutions are a joy to use and also help out the dev team with the transition to the web world.
Turn to page 2.
- Page 19 -
Slightly frustrated, you ask whether they have FPM skills?
If they say, “sure”, or “We know Web Dynpro, so let’s learn FPM since that’s also a strong UI development direction from SAP”, turn to page 20.
If they respond, “No and we don’t want to learn FPM”, turn to page 21.
- Page 20 -
You settle on FPM for your solution, realising that you’re really limiting mobile scenarios and such, but at least we can revisit the strategy in another year to see whether things have moved on.
Turn to Page 2.
- Page 21 -
You ask, “Um, do you at least have Web Dynpro Skills”?
If they respond, “Nope – Why would we want to learn that?”, turn to Page 23.
If they respond, “Yes – Of course!”, turn to Page 22.
- Page 22 -
You settle on Web Dynpro for your solution, realising that you’re really limiting mobile scenarios and such, but at least we can revisit the strategy in another year to see whether things have moved on.
Turn to Page 2.
- Page 23 -
You are in shock, and immediately go to the CIO to see about hiring a few A players and letting go any that don’t want to even learn new skills.
If the CIO does not console you or even understand the problem, you immediately quit – Turn to Page 2.
If the CIO consoles you but cannot change the team in the short term, turn to Page 27
- Page 24 -
You immediately realise that a lot will depend on the target clients, so you ask about mobiles, tablets and desktops; focussing on aspects that point to responsive or mobile design requirements.
If they respond with, “Only desktops in the corporate environment”, turn to page 17.
If they respond with, “Definitely a responsive design that can run on any client is required”, turn to page 25.
- Page 25 -
You realise that regardless of the team's capabilities and desire to learn, it is time to get up to speed on SAPUI5, Gateway and possibly SMP and Kapsel depending on mobile deployment requirements. Also, you get support from the CIO to hire a UX/UI Designer specialist who is also very comfortable with HTML/CSS to ensure solutions are a joy to use and also help out the dev team with the transition to the web world.
Turn to Page 26.
- Page 26 -
After a lot of effort in getting everyone up to speed, including change management and potential hiring and reorganisations, you live happily ever after (till the next SAP UI revolution comes along).
- Page 27 -
You decide to get SAP Screen Personas product and somehow come to grips to put forward a strategy to use SAP Dialogue programming; and try to live happily ever after.
- Page 28 -
I dedicate this book to the SCN Community who will shred into any opinion in this book that is unfounded or sometimes founded usually in the hope of making our community a better place to be, and to make our day jobs just that little bit better.
- Page 29 -
The End


 ) on different devices (iPhone and iPad) and with Chrome (desktop use case).


 .
.


 But the bottleneck here is, some find difficult to find the appropriate classes or choosing the right selector to target the controls
  So, to make life easier what if we create a function, say kind off a Plugin that provides additional functionality to all the controls. Say something like


